Posts

Showing posts with the label Essie

Simply Nails 2017 #3

Image
Lately I have been trying to get my nail polish mojo back again. I used to apply nail polish at least twice a week, but doing it even once a week seems to be an achievement. I have so much nail polish that I really need to make it my mission to apply it more! Lol. Anyway, I will be showing you a nail look that I recently created, I'm just hoping this becomes a more regular thing. I wanted to do something easy, but looked creative. I wanted a dark base, with lighter colours to be swirled through the base. For my base colour, I chose Models Inc Mid Nite Blue. I applied 2 coats, whilst the 2nd coat was still wet, I dotted on both Maybelline Color Show Iced Queen and Essie Your Hut Or Mine.  I then dragged a fine brush through the colours. This technique created some pretty interesting designs on the nail, plus it works quite well on even my stumpy short nails :) I've added this post to Ingrid's Monday Makeup Madness Link-Up Party.  ...
September Empties

Image
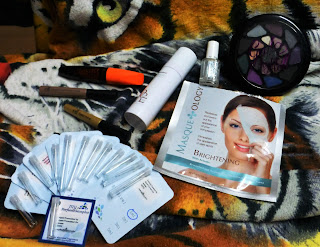
It really doesn't seem like a month since my last Empties post! Oh well, here goes.. A little bit of everything in this empties posts, except for perfume samples. Yeah, there's a lot of those! Masque-ology Brightening Mask- I bought some of these cloth masks online from Ozsale. It was very wet, but clung to my face well. There was a lot of product in this cloth mask. I removed after around 30 minutes. I then massaged the remaining serum into my skin. Repurchase? I didn't really see any changes in regards to whitening of my skin, which I could really use with all the pigmentation I have. However, I did find it soothing and very hydrating. I do have a couple of others that I am happy to use, but don't feel the need to seek them out to replace. Ciencia8 Preparation8 - This product takes the place of a toner. I would pump twice into the palm of my hand, then apply to my face and neck. It gently exfoliates so that it can be used everyday (am and pm) allo...

Metal Flake Nails

Image
I'll start by saying that this was not the mani I had in mind, but, thankfully it still turned out ok. I thought it would be such a great idea to apply nail polish using a toothbrush for a different effect. I assumed I'd get a pattern made up of tiny dots. Nope.  OPI "Passion", Ulta3 gold polish, LA Colors "Live" and Essie "Pure Pearlfection". I thought a natural colour would be a good choice to apply gold and silver over. Using an old toothbrush, I dabbed both gold and silver on my nails. It seemed to give a gold leaf kind of effect to these metallic shades. I then applied Essie "Pure Pearlfection" to tie both shades together. In future, I think I will stick to using my old toothbrushes as little scrubbing brushes for cleaning the bathroom, lol.

Nail Art

Image
Well, with that boring post title, I am grateful that you are still reading my blog post! When it comes to nail art, sometimes I have so many ideas that it is hard for me to choose one to try, then at other times I struggle to come up with something. Of late I've experienced the latter. As I write this, I should have thought to do this earlier, but I really should be jotting my ideas down when they pop into my head. My brain only really works well when I don't need it to, lol. A little brain storming, well more than a little, I came up with an idea... Essie nail polish (label is gone) and NYC "Lolly Pop", plus my handy dotting tool and a little striping tape. Using nail striping tape as a guide, I used both shades on my nails, the shades separated by a diagonal line.Then using one colour at a time, I placed dots of each nail polish, making sure that the dots over lapped the other colour block side. How about I just show you the result. I was ha...

Marker Manicure

Image
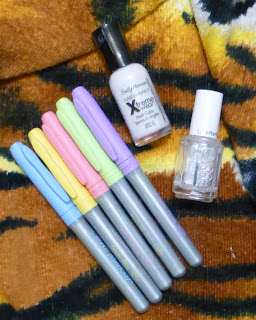
You're probably wondering what a Marker Mani is. It's simply a manicure using marker pens. I guess it's kind of cheating, but hey, I'm all for simplicity and short cuts. I got this great idea from Beauty Heaven .  Because the pens are pastel, I opted for Sally Hansen "White On", to give the best base colour. I scribbled on each coloured marker pen, then used a cotton pad with a little remover to dab on the nails and soften the effect. I also finished the look with my fave top coat Essie "Pure Pearlfection". It reminds me a little of tie dye, lol. I hope you are having a wonderful day :)

Easter Nails

Image
For this year's Easter nail mani, I went for some fun pastels and a cute design to stamp over them. Not necessarily easily recognizable as being Easter themed, but lately my creative side has been lacking, so a simple look was what I was after. The base colours I used were Ulta3 "Honolulu", Maybelline Color Show "Green With Envy", Face of Australia "Funky Town" and Essie "Lion Around".  Instead of painting the whole nail, I stroked 3 columns of colour, of different height, creating a scalloped design. Also allowing me to incorporate the highly popular negative space. I chose a stamping plate with some round shapes, reminiscent of eggs..well, sort of, lol. I used Sally Hansen Xtreme Wear "White On", a fantastic white for stamping.  Then because I can't seem to get enough of Essie "Pure Pearlfection" top coat, I added a coat of this gorgeous clear polish full of tiny diamond-like sparkle. ...

Water Decal Nail Art

Image
A super easy way to turn a nail look into something special is by using water decals. The hardest part of application would be placement, but I much prefer the finished look to using stickers. My personal experience with stickers is that even when I use a top coat, they tend to lift from the nail, so frustrating! I wanted a pink nude base for the white floral designs of the decals. OPI "Dancing in the Isles" seemed like the perfect choice. Once the 2 coats of nail polish had dried, with tweezers I held each design (cut out with scissors earlier) in a jar of water for 20 or so seconds, then placed on the desired area of the nail. I find gently moving the backing with my finger, slides it off, with the design left in place. I so hope this makes sense. The decals I bought from eBay do have instructions. I finished the look with Essie "Pure Pearlfection". This gorgeous top coat gives a beautiful shimmer to any nail look. Have you tried water decals be...

NOTD- Slate Steps

Image
Ever since I'd created a "step" mani, I'd had many ideas for different colour combinations. I figured enough time had lapsed to create another one :) As explained in my previous "step mani" post , I used Blush-Amour pearl with a silver glitter topper from Funky Fingers  for the base. Then the steps were created with Orly "Liquid Vinyl", Essie's "Fair Game"and "Da Bush". I just love the ease of this mani design, yet it looks like a lot of effort has been made to create it :)

Leopard Print NOTD

Image
I just love Leopard print nails. I can think of so many combinations and ways of showcasing this design. I've stamped the design on before, but I like the look of the design done freehand. What was holding me back was not feeling that I could create an acceptable leopard print design. Finally, I took the plunge, what could I lose? Polish remover has erased many a bad nail look. After applying OPI Passion for my base colour (which I neglected to include in the pic, oops!), I then added a coat of Essie Pure Pearlfection for a touch of shimmer. Once the coats were dry, I dabbed Essie Your Hut Or Mine in desired edges of my nails, apart from my accent nail, where Your Hut Or Mine is the base colour and Models Prefer Flushed used for the Leopard spots. To finish off the spots, I used a brush to define with Orly Liquid Vinyl. A coat of Seche Vite top coat finished my mani. Now that I've discovered that I can create a passable leopard print, I now want to try other idea...

Glitter Topper Nails

Image
I love sparkly things, but for my eyes I want shimmer not glitter. What do I do with glitter eye shadow? Put it on my nails!  When I placed an order with Mon Ennui, I ordered some colour shifting eye shadow, I didn't realise how large the glitter was in some of the samples, so the 4 jars sat unused in a make up draw. When I say unused, I don't mean not admired, as I'd often pick the jars up and be mesmerized by the gorgeous colours. Desperately wanting to use them, I decided I'd try applying on my nails. For the base colour, I decided to use Essie Da Bush.  Whilst the second coat was still wet, I sprinkled Mon Ennui Siren over the top. To even out the surface, I applied to thick coats of Seche Vite. I included so many pics to try and capture the sparkle and gorgeous colour of the glitter. I have 3 other glitter eye shadows from Mon Ennui that I'll be sure to post when I apply those to my nails :)

Stormy NOTD

Image
Although I generally reach for bright and/or bold nail polish when deciding on a colour for my nails, I recently wanted something different. A colour that I can't remember wearing is grey. It may sound like a boring shade, but I think it can look quite classy. Seeing that grey is such a rarity for me, one shade was not going to be enough.  After my mandatory Orly Bonder base coat, I applied the lightest polish, Essie Da Bush as the base colour. Next, using a sponge eye shadow applicator, I dabbed Essie Fair Game from halfway up, to the tip of my nails. I then repeated this step with Orly Liquid Vinyl (not grey, I know, but black finishes the look, I think) concentrating on the tips. To add a sprinkle of shimmer, I applied Essie Pure Pearlfection, I just love the effect this polish gives. Then finished with Seche Vite top coat. It's nice to try a different shade :)

Anniversary Nails

Image
My husband and I hit a milestone today..it's our 10th Wedding Anniversary! So, as with most special occasions, I must create themed nails :) It took me a while to decide on a design, but finally decided on a way to incorporate both of our favourite colours, green and pink.  After my base coat of choice, Orly Bonder, (no surprise there) I applied Blush-Amour no 32 for a base colour. This is a gorgeous pearl white colour. It is quite a sheer shade. The next coat of this colour was rather thick, I didn't want it drying in a hurry.  Next I applied dots of  Sally Hansen HD polishes in Pixel Pretty and Digital, both gorgeous metallic colours. I only applied these dots to the top half of my nails.  I also added a couple of dots of Blush-Amour in a shimmery gold, which I seemed to have left out of the pic, oops!! Blush-Amour can be found at select "cheapie" stores, I think I paid $2 each, and I must say that the quality is quite decent.  Moving quickl...