Posts

Showing posts from January, 2023

Miracle BR For the Undereyes

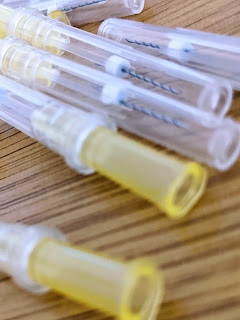
 My dark undereyes are something I've just come to accept that I will always have. I've tried so many eye creams over the years that admittedly some have helped reduce the appearance of lines and crepiness but this is due to their hydrating properties that I can get from my regular moisturiser. Nothing has worked on the dark circles that are due to both genes and allergies. My search was over until I started to DIY injectables and came across a product from the Miracle line, Miracle BR. Could this treatment be the product I have been searching for? I can't answer that yet but I was happy to try it. With ingredients like vitamin C, niacinimide, peptides and XT80 a whitening boosting complex this product is formulated to inhibit melanin in the skin, reducing pigmentation and age spots. Pigmentation is something I also have accumulated over the years from both acne scarring and too much time in the sun without protection. I had planned to inject Hyaron, so opted to just try Mi

Miracle L Round 2

Image
After not having any adverse reactions to my first round of biostimulator Miracle L I decided that I would use the technique created specifically for the injectable Iniblanc. This product is very similar to Miracle L in that it contains polycaprolactone or PCL, so it makes sense to use this mapping as opposed to a more hydrating injectable that the BAP technique works better for. As seen in the images above, mapping for this product consists of 10 injection points for maximum coverage with the least amount of injections which suits me just fine! The amounts for the points under the eye are recommended to be at 0.5 cc and the remaining spots at 0.2 cc, although to fit a procedure into one vial I opted for 0.2 cc per point and treating my lips with tiny blebs of the remaining product. This method is one that I will continue to use, outweighing the longer amount of discomfort when injecting all over the face. It's only 10 points, so worth it for a quicker procedure. Sounds like a succ

Back To BAP with Hyaron

I'm so glad there's an injection mapping for the hydrating injectable Hyaron. I will meso when necessary but I just don't like injecting myself so many times. It can be so time consuming and I'd much prefer injecting more product each time if it means less poking into my skin.  I have previously blogged on the BAP technique, you can read more about it here , but a quick overview is injecting into 10 designated spots on the face that are in high movement areas to ensure spreading of the product throughout the face.  The only downside being the small bumps created but for me these disperse within an hour, can last longer for some though. Now something I haven't mentioned about Hyaron is just like applying hyaluronic acid if you don't include moisturisation it will feel drying on the skin, with injecting this product you have to remember to drink plenty of water to maximise the hydration benefits of this product for the skin. Anyway onto the video :) Thanks to an a

Screw Threads in Forehead

 If my plan is to build structure in my face with threads, it makes sense for me to treat my forehead. Makes sense, but it really is not an area that I enjoy doing treatments because it's one of those painful areas due to there not being a lot of, for want of a better word, flesh. Another reason for my hesitancy was because I bruised when inserting near my brows. Not just my forehead, but I also had black eyes from the procedure. I really had to pick a time that didn't clash with anything social. Generally hard to do during the festive season so luckily I'm a homebody lol. I figured that the 30 gauge x 25 mm PDO screw threads would be beneficial for this area. I began with threads through and above my brows, then 2 vertically for more collagen building. I also targeted between my brows where the 11s lines form. It was not as easy as the screw threads that I inserted in my cheek area. But I took my time and adjusted when necessary to insert the needle into the correct plane.

First Time Trying Screw Threads

Image
 After having used mono threads was I ready for screw threads? Well, I was about to find out! I had left it longer than planned since the last time I had inserted threads so I was both excited and nervous about trying the screw threads. The only threads I have tried are the PDO mono (smooth) 30 gauge x 25 mm so for my first time trying screw threads I went for the same size.  Screw threads consist of the PDO ( Polydioxanone)  be ing twisted around the needle which means more thread is being inserted and can increase volume during the breaking down of the thread with collagen build-up. My aim at the moment is to create structure in my skin for further treatments like cog threads which create lift. I wanted to target my cheek area because I have high cheek bones, aging means my cheeks have become slightly hollow. It's not something I am overly concerned  about, but volume in that area would be a bonus. I was aware that screw threads can be a little harder to insert so I was quite sur